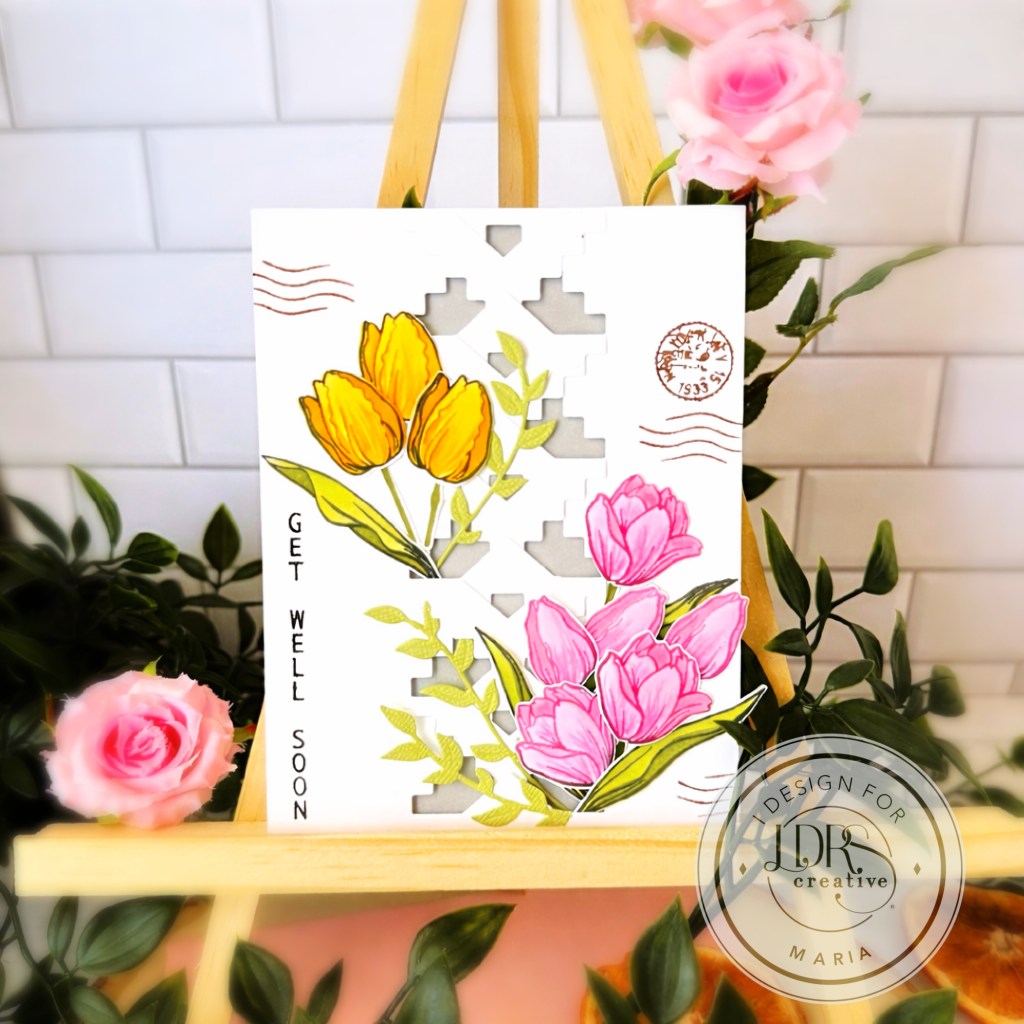
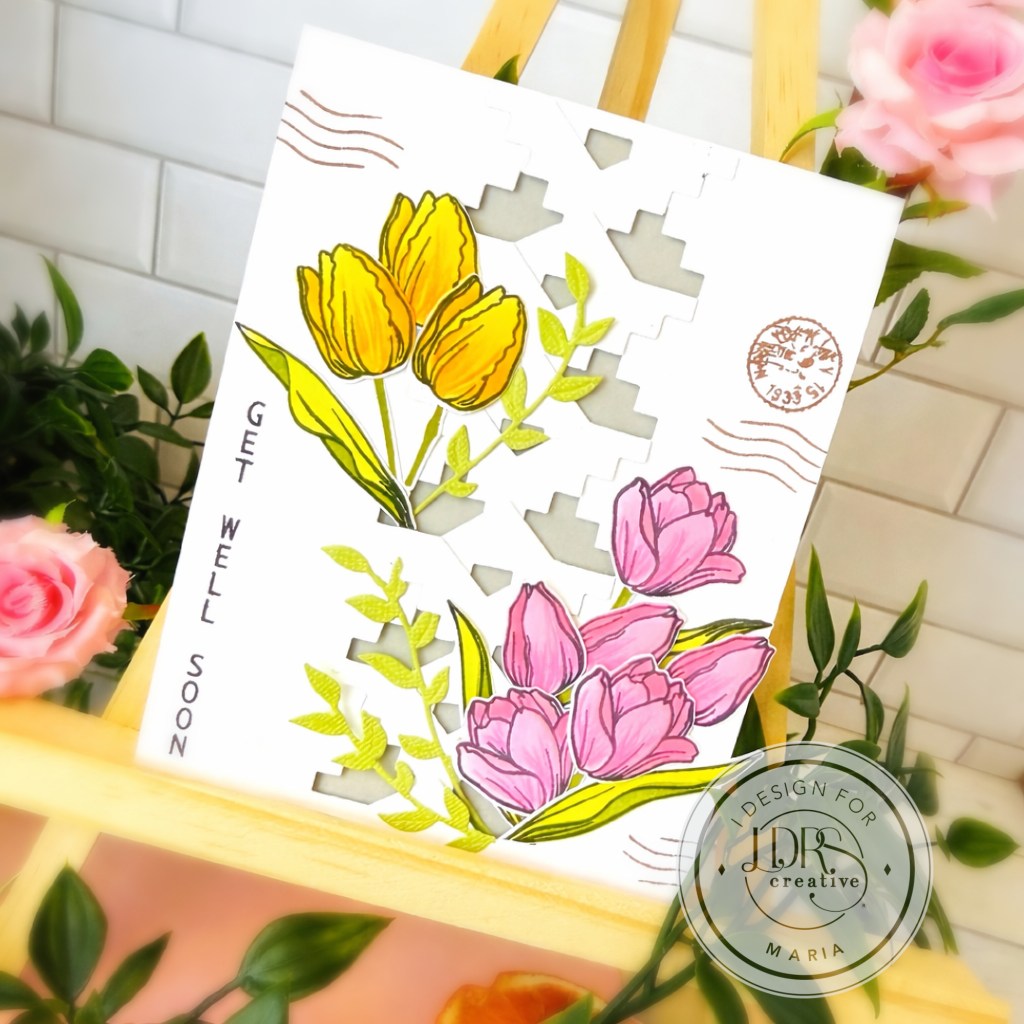
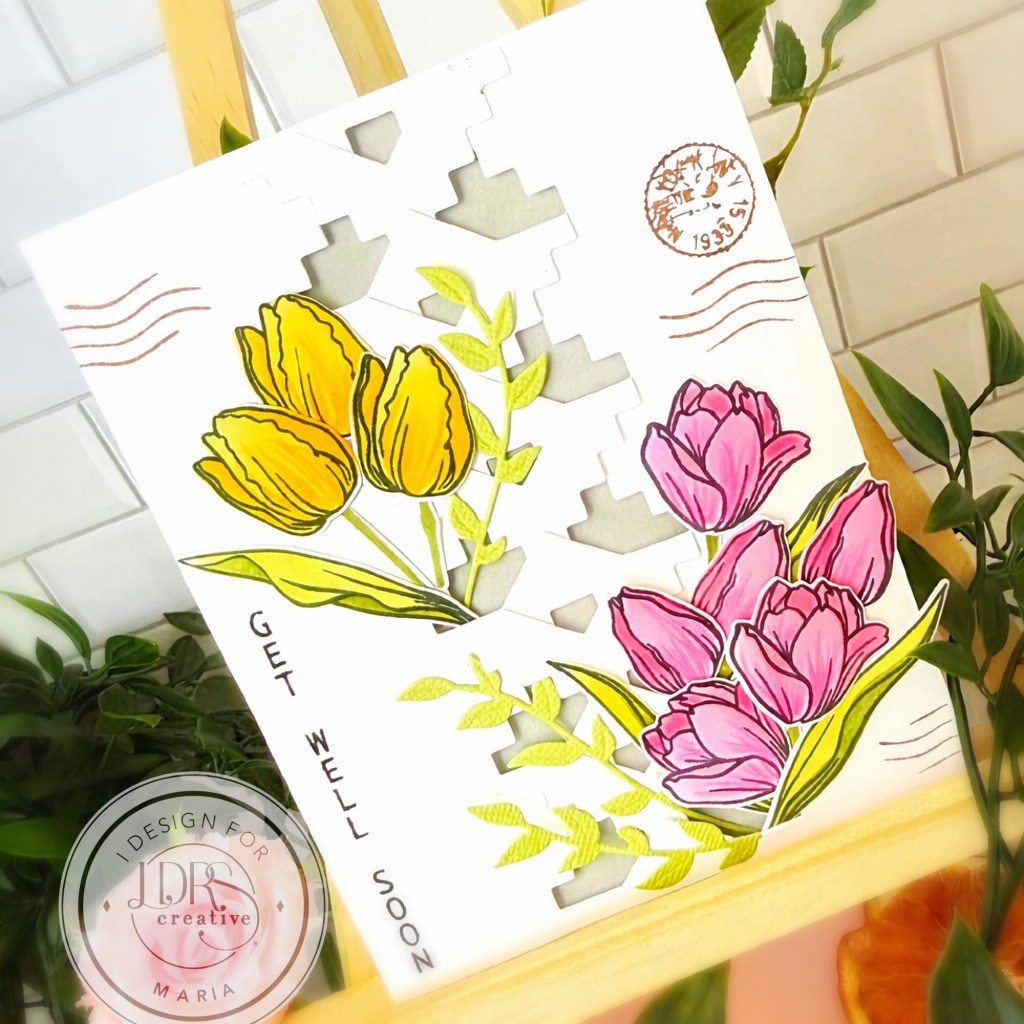
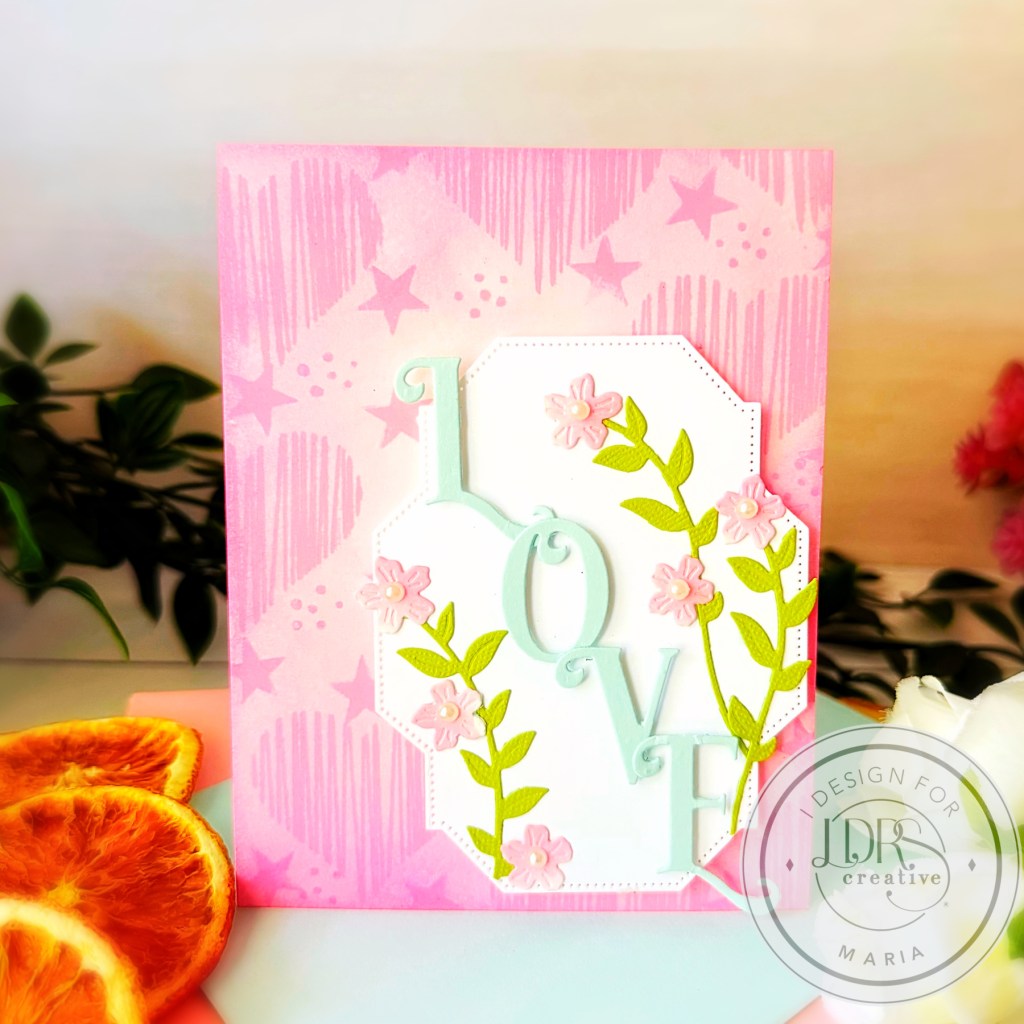
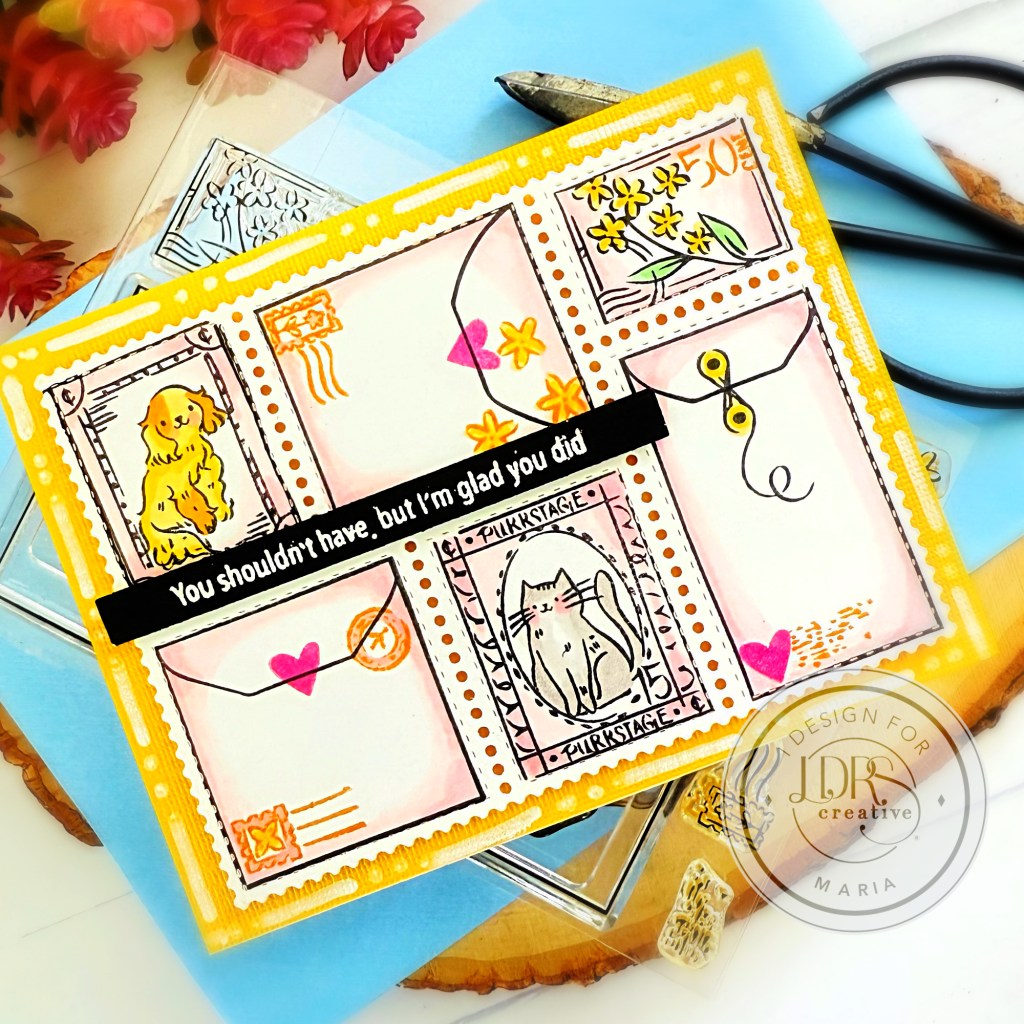
Hello, and thank you for stopping by! I would like to share this really cute Get Well Soon card below, showcasing the following products from LDRS Creative:
Fuzzy Wuzzies Cone of Shame Stamp Set + Dies
Everyday Vertical Sentiments Stamp Set
Home Design Foliage Add-On Die Set
Mixed Scallop Rectangle Die Set
Cottage Way 4 Color Ink Bundle
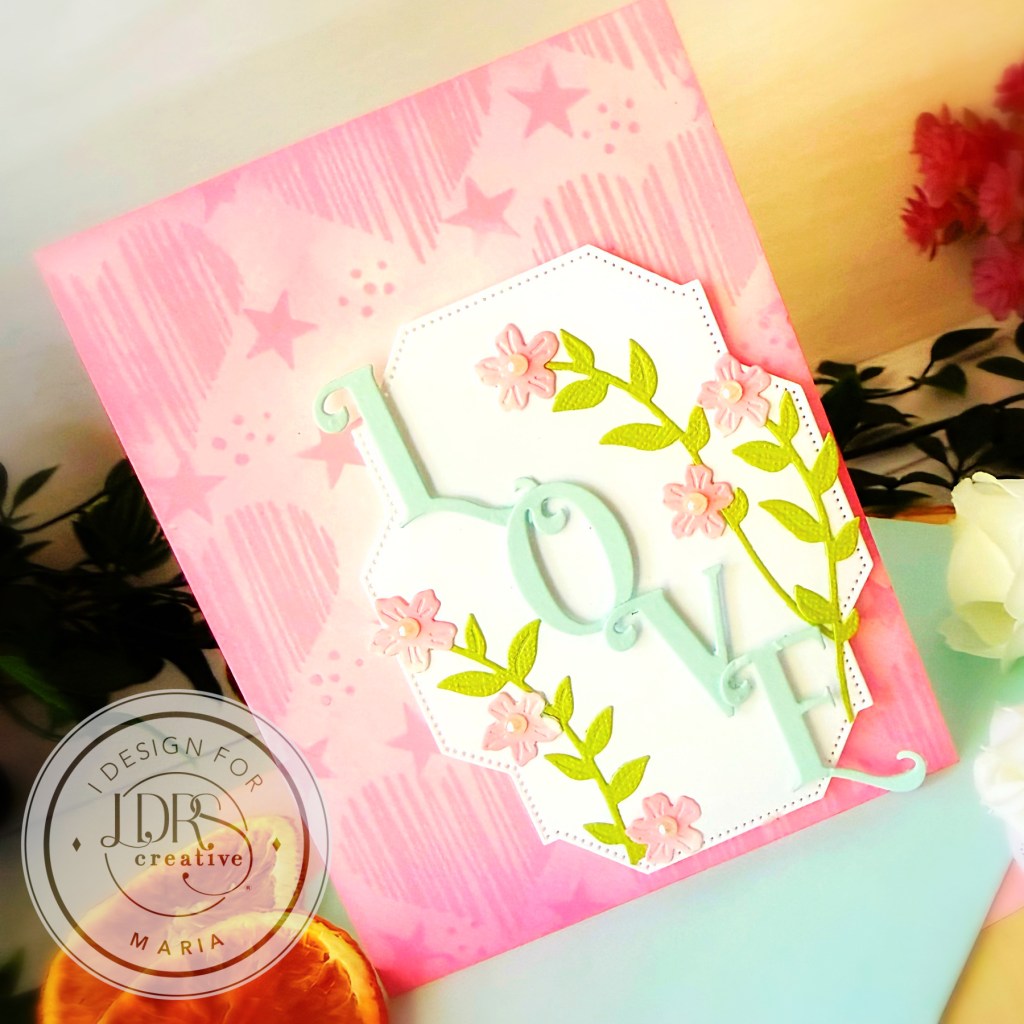
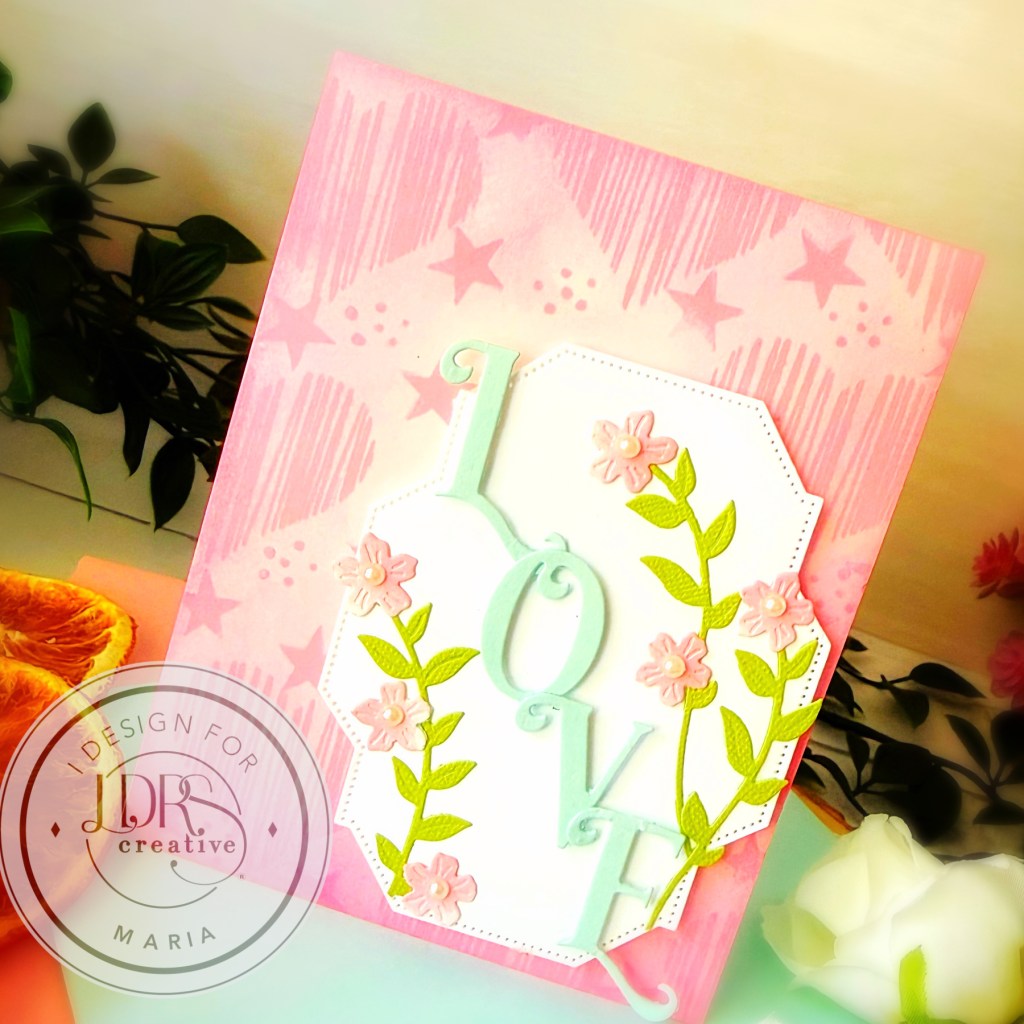
Rainy Day Stencil
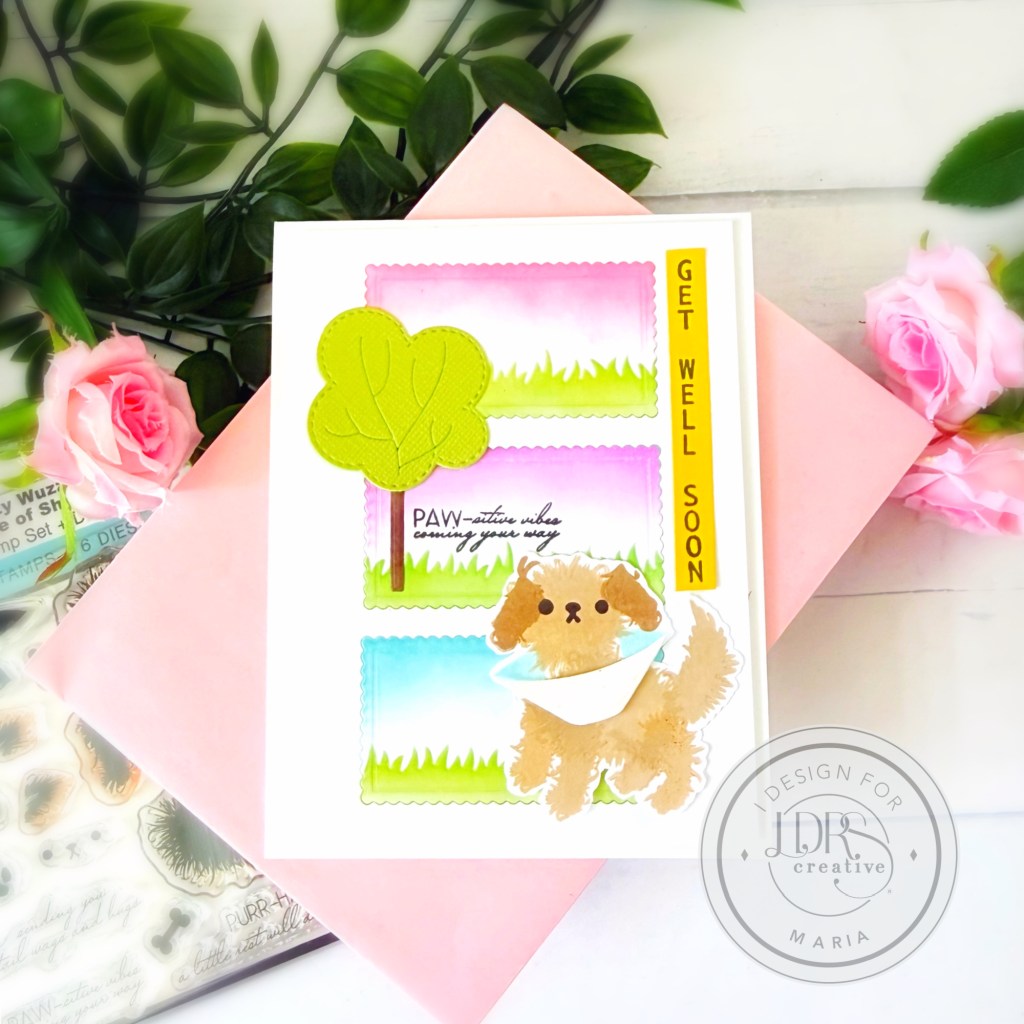
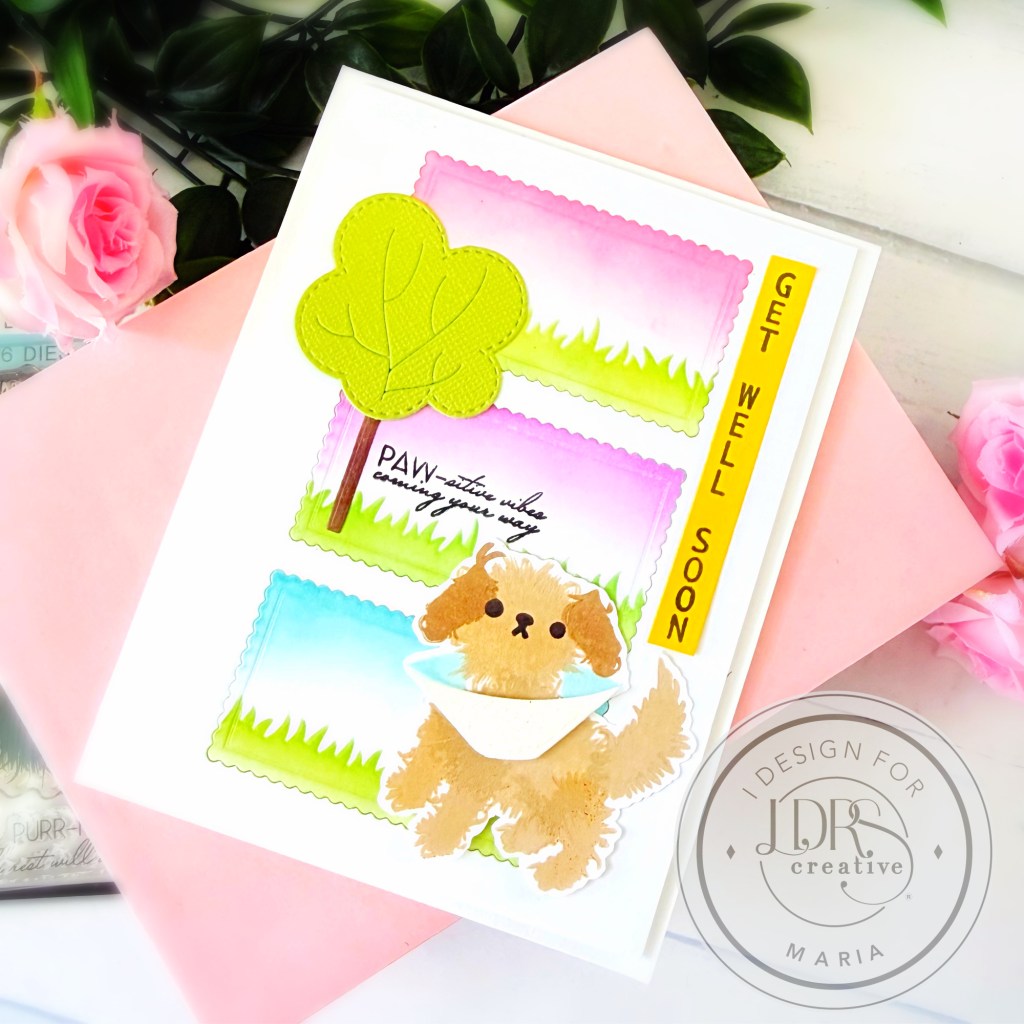
I started by die-cutting all the components that I needed to create the scene using the Home Design Foliage Add-On Die Set and the Mixed Scallop Rectangle Die Set.
The little scallop rectangle die-cuts were easy to ink blend with the new Gelato 4-Color Bundle, Pink Tutu Hybrid ink, and the Rainy Day Stencil. I absolutely LOVE the new hybrid ink colors!
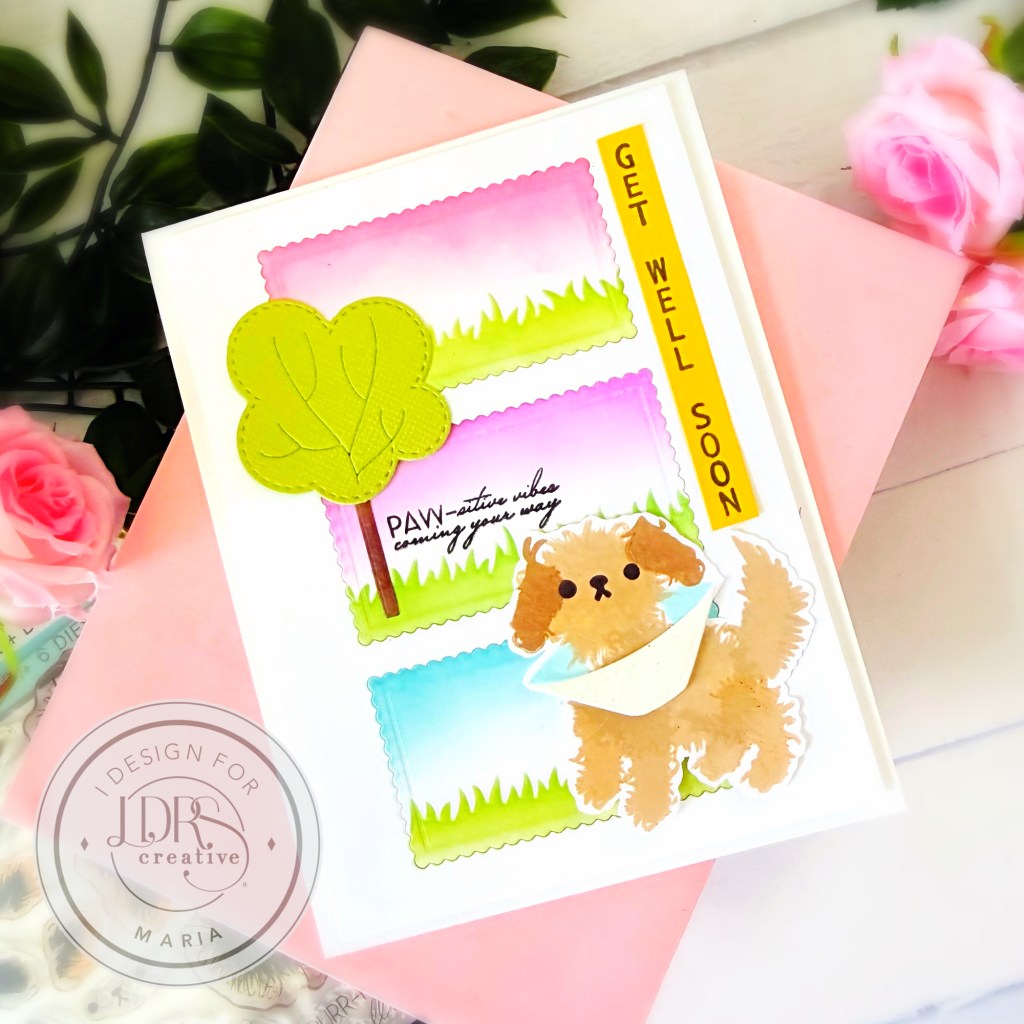
The scallop rectangles and the negative die-cut were foam-mounted onto an A2-size card base to give dimension.
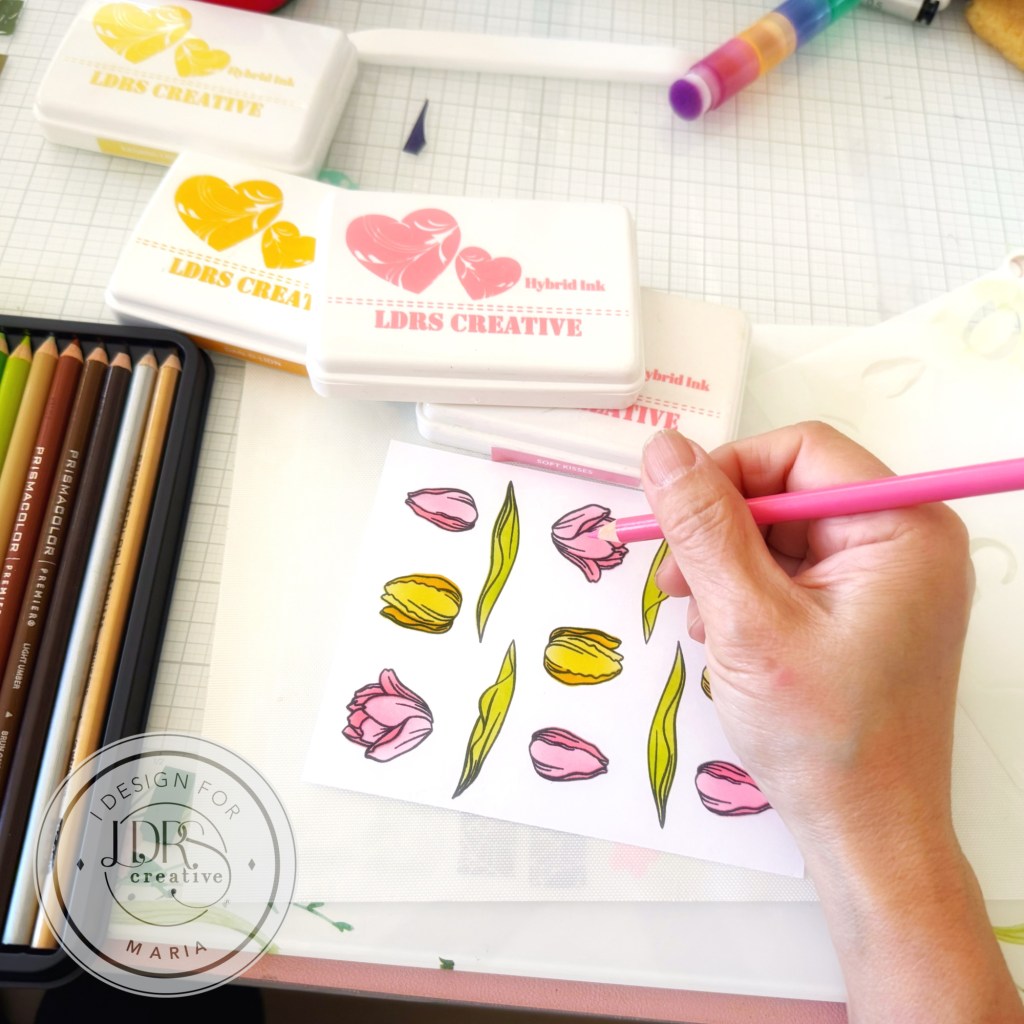
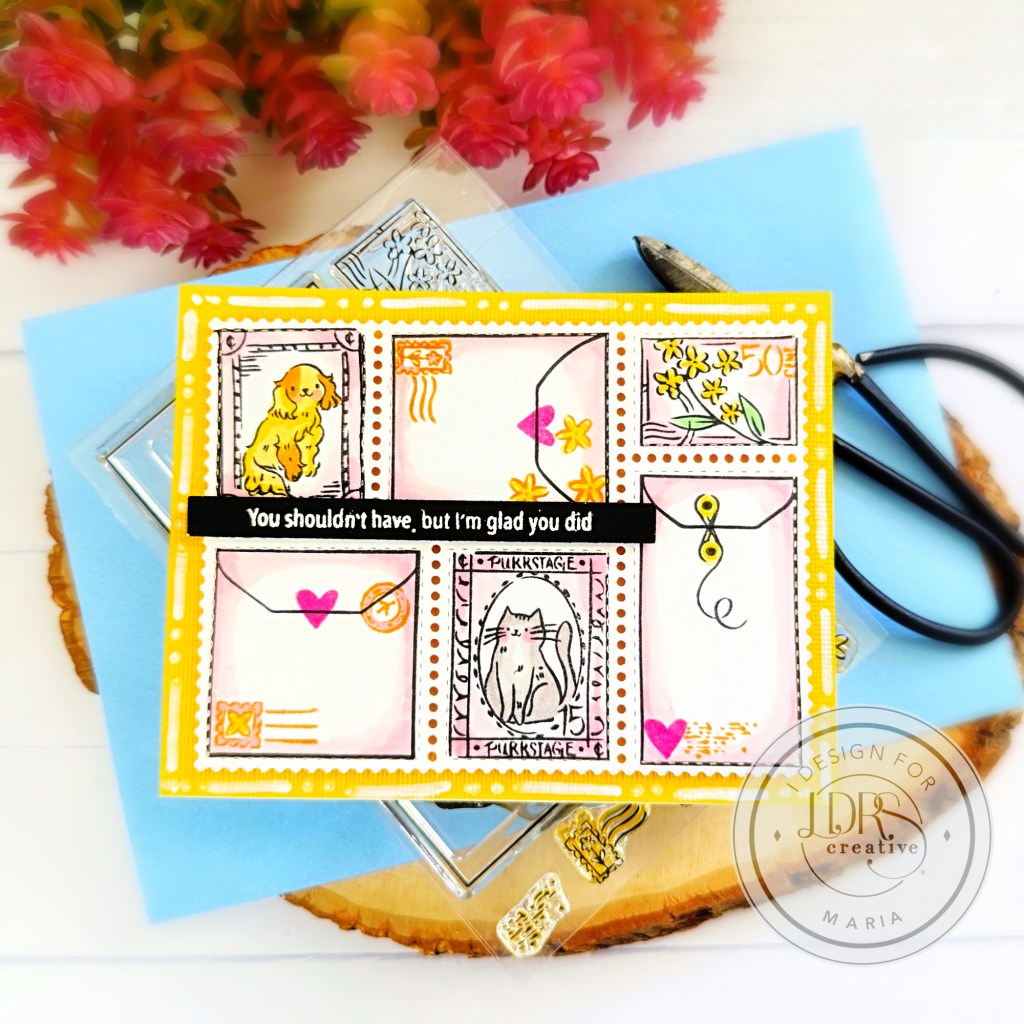
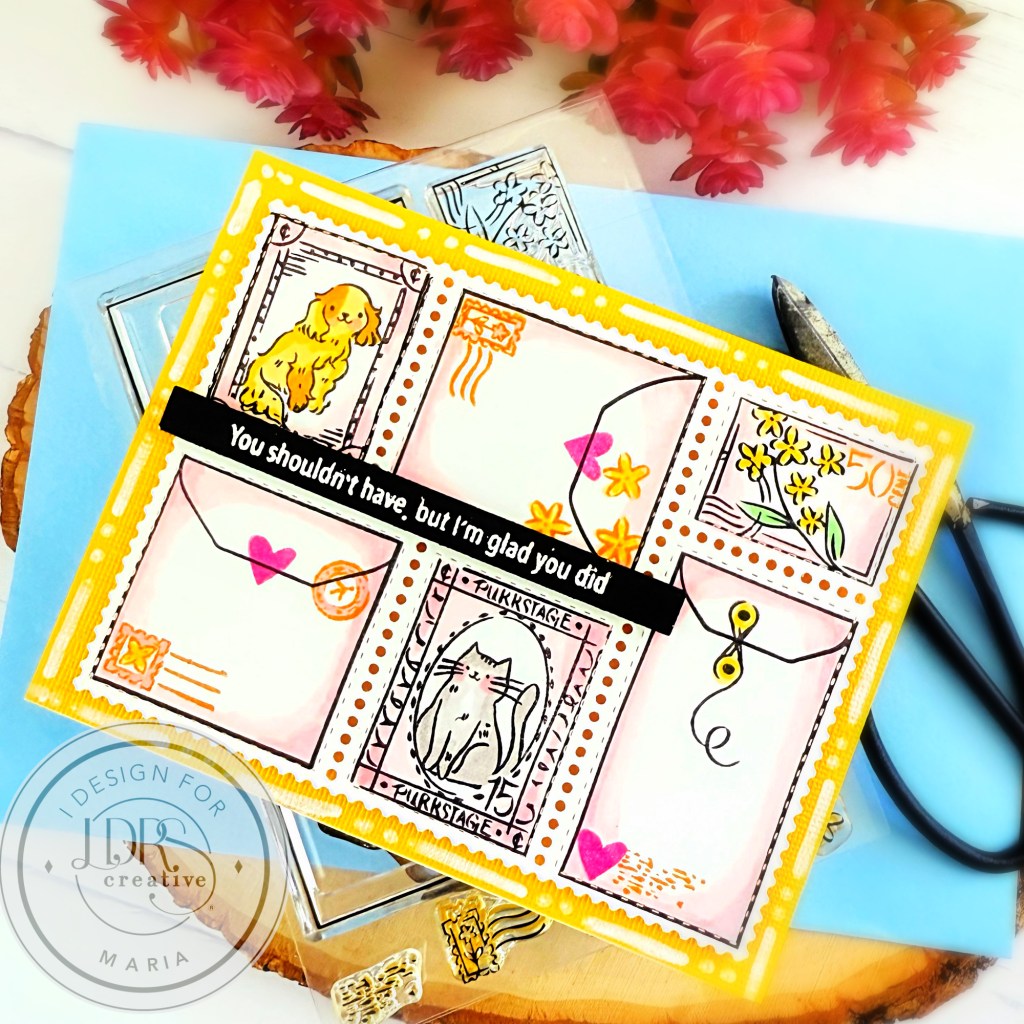
Next, I stamped the little fuzzy dog using the Fuzzy Wuzzies Cone of Shame Stamp Set + Dies and the Cottage Way 4 Color Ink Bundle. [For reference, the colors I used on the dog were CaraMellow, Milk Chocolate, and Stone Washed Jeans.] I fussy-cut the dog using precision snips and foam-mounted it on the card.
I finished the card design by stamping the sentiment on a yellow strip using the Everyday Vertical Sentiments Stamp Set. Here’s another look at the finished card:
I hope you like the card and got inspired to re-create this beautiful scene! Thanks for stopping by!